Pipe Making
The Pipe Making subsection of Pipedia serves as the Wiki home of the PipemakersForum.com. Much of what appears here is gleaned from the Forum. We highly recommend reading and participation in the forum in addition to reading and contributing here.
New pipe makers may find this chart helpful. Classic Pipe Shapes, by Bill Burney:

Getting Started
Many pipe makers in the US start out with a small book called Pimo's Guide to Pipe Crafting at Home. While far from exhaustive, this small book offers many helpful tips on pipe making with minimal tooling. Also helpful is the article Pipe Making For The Rank Amateur, by Bob Everett. The Dan Pipe Hobby Catalog has some good basic information as well.
A Cautionary Note: Because some ultra high grade pipes sell for thousands of dollars, it is tempting for the uninitiated to think they may be able to get rich making pipes, or at least make a decent living. Relatively few pipe makers make their primary living as pipe makers, and it is a very small handful of pipe makers that sell in the upper price ranges. Those that do have unusual talents or gifts and have dedicated a great deal of time developing them. Most also invest a considerable amount of money in equipment and materials. Having said this, pipe making is great fun, and very rewarding in many ways, but be careful--most pipe smokers are not addicted to tobacco, but most pipe makers are addicted to pipe making!
Believing: "Damn the torpedoes, man, full speed ahead."
Pipe Kits:

Pre-bored pipe making kits with pre-fit stems are a good way to start, especially for those who don't have access to many tools, or previous woodworking experience. With the kit, the new pipe maker can focus their efforts on shaping and finishing the pipe and avoid the pitfalls associated with drilling the tobacco chamber, airway, and mortise, not to mention facing the shank and stem to meet perfectly, and turning the tenon of the stem to fit snugly in the mortise. These steps are all great fun and some first time pipe makers start right in from scratch, but it can be a bit overwhelming and tool intensive for the beginner without a background in woodworking or machining trades. Even with the pipe kit, it is still possible to do some "tweaking" of the airway in the shank and stem, as well as thinning the button area and carefully funneling the slot. Careful attention to tweaking in the generic mechanics of a pipe kit after shaping the stummel and shank can turn it into a really fine pipe, and every bit your own creation.
Pipe kits generally come in variations of three basic styles intended for bent pipes, straight pipes, or freehand pipes. Several pipe makers also offer custom kits. Kits are available with two different pre-fit stem mounting styles (flush or military mount), and using either ebauchon or plateaux cut briar blocks.
Ebauchon blocks are generally used in the manufacture of machine made pipes. They are most often cut perpendicular to the axis of the straight grain, which renders cross grains with birdseye. They tend to have more inherent flaws than plateaux briar. They are typically good for a small to medium pipe, and are most often cheaper, and often recommended for a first pipe.
Plateaux Briar, as the name suggests, is the top part of the burl. It has a rough pebble top that can be left on for a freehand look or sanded smooth for a traditional appearance. Plateaux comes in different shapes and sizes. The custom pipe kit makers will do the best they can to match your design to the proper block. Plateaux grain tends to run straight or angled. These blocks will generally yield flame grains or an occasional straight grain. They contain generally less flaws than ebauchon, though you don't know what a block will yield until you get into it.
Pimo offers kits, but most pipe makers will recommend obtaining a kit from a pipe maker, such as Steve Norse at Vermont Freehand, or American Smoking Pipe Co's. (Mark Tinsky), available at The American Smoking Pipe, or from Tim West (J.H. Lowe), available at J.H.Lowe. Kits are also available from Pipe Makers Emporium, Kim Kendall at Penguin Briar.
In Denmark kits available from P.E.Hermann. In Norway kits are available from Tabago. In Germany kits are available from Dan Pipe.
Basic Tools

It is wise to refrain from investing in expensive tooling until you have made your first few pipes. Tools needed to complete a pipe kit:
- Electric Hand drill(variable speed 3/8" or larger)
- Buy or build a jig that will enable you to clamp the drill to your work bench or table.
- Flexible 3" to 5" sanding disk and arbor, and assorted grit sandpaper.
- At least 2 6" buffing wheels and arbors, buffing compounds, Carnuba wax.
- Files(Nicholson makes nice file sets at affordable prices. One can never have too many files of various sizes, shapes and cuts). A round chain saw file is also very handy.
- Coping saw for rough shaping
- Eye protection and respirator or dust masks.
The electric hand drill and accessories is optional. It saves a lot of time, and can be used for many other things should pipe making not be an ongoing interest. Still, it's amazing how much one can do with just files, sandpaper, and elbow grease.
It is best to use only one type of compound on each buffing wheel. Ideally it is good to have four. Two muslin ones for compounds, one muslin one for applying the Carnuba wax, and one flannel wheel for the final buff.
Note: The above tools are very adequate for working with pipe kits. If you're planning on drilling the stummel (briar block) and then fitting the stem to the block, you will also want either a more elaborate jig for mounting your hand drill, such as is described in the Pimo book, a drill press (drill press frames for holding your hand drill would also work), or a lathe. In addition you will need to buy or make tobacco chamber bits, and buy drill bits for drilling the mortise and airway (see Tooling).
Basic Supplies
The following supplies may be needed to complete a pipe kit:
- Sandpaper in the following grits: 150, 220, 360, 400, and 600.
- Stain of your choice. Use alcohol based analyn dye, or leather dye
- Denatured alcohol for thinning stains and wetting the pipe to see grain and scratches
- Buffing compounds (tan or brown tripoli and white diamond are a good start).
- Carnauba wax for a smooth finish, and/or maybe shellac for a rusticated finish.
Many of these items can be purchased locally. Others can be ordered with your pipe kit. Also see Materials and Supplies.
Design and R&D
This section is under development. We hope to add more articles and topics pertaining to Pipe Design and Mechanics as they are found and collated. Trever Talbert on Design Work
Airflow
Many pipe enthusiasts are familiar with Rick Newcombe's writing on airflow, where he suggests that pipes with an open air flow smoke better. While not the originator of this concept, he has been its most public advocate, and duly credited with its popularization. Ken Campbell has written an article for The Pipe Collector called Airflow: The Key to Smoking Pleasure which further explores the concept.
The concept of "opening" was originally employed in the after-market modification of production engineering. Many pipe makers have adopted elements of this concept of airflow, with many American makers using airways ranging from 9/64" to 11/64". A related and perhaps more important aspect of an open air flow is providing for constant airway volume as it passes through the sections of the pipe. This concept was pioneered by J.T. Cooke and further developed by Trever Talbert, Jody Davis (J. Davis) and Todd Johnson. While traditional pipe engineering often utilizes different diameter bits for airways in the shank and stem, this constant volume technique employs the same overall diameter bit throughout, with the exception of the last 1" or so at the bit. Here it tapers evenly down while also widening out. This provides for a comfortably thin bit, while also providing for a constant volume of smoke throughout the smoke stream.
Stummels
The "Stummel" is the briar portion of the pipe, which includes the bowl and shank.
Briar
→ Main article: Briar
Here are some interesting articles on briar:
- Characteristics Of Briar is a very thorough and interesting research paper in .pdf format by G. Tsoumis, N. Kezos, I Fanariotou, E. Voulgaridis, and C. Passialis documenting the various characteristics of briar.
- Curing & Treating, by Trever Talbert
- Where to Get Your Briar, by Kurt Huhn
- 100 Year Old Briar?, A small collection of information by Bill Unger.
- R.C. Hamlin has also written an interesting article on this subject of briar called The Briar Factor.
- So you think you're a "Briar Afficionado"? This is a short but extremely informative article by Rainer Barbi available here: The Briar Saga Page 1 & The Briar Saga Page 2.
- My Visit to A Briar Sawmill, What Makes a Good Briar Pipe, The Art of Sandblasting, and Curing all excellent articles by R.D. Field.
Morta
→ Main article: Morta
Morta is semi-fossilized wood. It is created when large trees are felled or overturned by geologic activity and become buried in an oxygen-limited fashion, usually in peat or clay. The wood is unable to rot normally so it begins the long process of fossilizing into stone. Morta is a generic term used to describe any semi-fossilized wood of this style. Morta is found in various locations across the globe, usually in marshlands or moors, and varies widely in its durability, age, and potential usefulness for pipe making. Trever Talbert is one of the pipe makers using Morta for one of his lines of pipes, and the Morta he uses is from a local oak forest that covered the Briere area some 3,000+ years ago. Trever describes the process in his article Creating Pipes From Morta.
Other Materials
Most pipemakers and collectors would probably agree that Briar (a term with considerable range) is the choice for tobacco pipes. Briar grain can be excellent aesthetically for the small-scale work that tobacco pipes are. Briar can also have other properties which are desirable, a sweet, mild, pleasant aroma when cured properly, and a resistance to burning. Still, some pipemakers use other materials, like Ebony (wood), African Blackwood, Morta (fossilized wood), and many other species of wood.
The dust of most wood is an irritant and can sensitize. The dust from Beech, Hemlock, Oak, Oleander, Quebracho, Redwood, Sassafras, and Yew are listed as carcinogens, but little is known about their smoking properties. Although the exact origin of a particular block of briar is often unknown, the fact that it only seems to flourish in remote, mountainous areas, means it probably has less chance of being affected by the pollutants of industry and civilization, and briar has been used in pipemaking since about 1840 according to Rainer Barbi.
I, personally, have seen no examples of European classical pipes made of Catlinite, the Red or Black "Pipestone" used by Native American (Indian) pipemakers.
"It is believed that the Mayan people of Central America were among the first pipe smokers several thousand years ago and archaeologists have found pipes dating from around 2,000 B.C." (Source: http://www.bat.com/ ...British America Tobacco company)
I have used Hard Maple, Black Walnut, and even sticks from the Photenia (Redtip) shrub for experimental pipes, and I also have smoked them regularly. These woods were merely cut and then dried thoroughly for several years. The characteristic smell and taste of each wood is distinctly noticeable when the pipe is first smoked. I smoke my pipes, perhaps too heavily, and once they are broken-in good, saturated with tar, and the bowls heavily caked, I don't notice much effect on the quality of the smoke?
Also see Alternative Woods Used For Pipemaking.
Overview
The basis for the following section was written by Tyler Lane for his website, and is used by permission.
The internal engineering of a pipe does a lot to determine the smoking qualities of a pipe. While it is most certainly critical to start with good briar, it is also important to take care to do a good job of drilling in order to maximize the potential of the briar. A poorly drilled pipe is not only a sign of a maker's sloppiness, but is likely to hurt the smoking qualities of a pipe.
Essentially three holes need be drilled in the briar block to make it into a pipe. The tobacco chamber , the draught hole (or smoke hole), and the mortise (the hole in the end of the shank which the stem is inserted into).
Most tobacco chambers are 5/8"-1", and I estimate that the majority of handmade pipes have tobacco chambers from 3/4"-7/8" range. The profile of this holes ranges from a U-shape to a V-shape, determined mostly by the shape of the bowl. A tobacco chamber's diameter is measured at the top of the bowl.
Draught-hole size is a topic of much debate. The size of this hole is a large factor in the openness of the draw, and the debate is over which size brings the best smoking characteristics. I personally use 5/32" (3.97 mm), and this is on the larger size of the debate. Some endorse a draught hole as large as 4.2-4.3 mm, while some say that 3.2-3.5 mm is the optimum size. Ultimately, there are so many variables, from tobacco chamber size and shape, to the nature and curing of each block of briar, that it is nigh on impossible to claim a best size for all scenarios. As such, a compromise much be reached, and each pipe maker must use a size that he determines best matches his, and his customers', desires.
Finally, there is the mortise. This needs to be very cleanly cut into the shank to provide a nice fit for the tenon on the stem. Most mortises range from 1/4"- 3/8", with the norm falling around 5/16".
Drilling can be done at various points in the carving process. I personally drill the holes as the first step of the pipe making process, in the order of draught hole, mortise hole, then tobacco chamber. I think this is the standard order of events for most hobbyist carvers. Many of the Danish carvers, shape the pipe first then drill the stummel by hand after it is shaped. The advantage to this process is that the shape of the pipe is not constrained by the pre-bored holes, and the shape can therefore be adjusted to maximize the beauty of the grain and minimize pits. It is not practiced as often as the "holes-first" method, I suppose because of years of practice necessary to develop the degree of skill it requires to drill the holes properly by hand.
The following articles should prove helpful in understanding the process of drilling and shaping the stummel.
Processes
Pipe makers use a variety of methods to accomplish the basic tasks of making a pipe. The following articles attempt to chronicle methods for working with stummels that are in use by some respected pipe makers.
- Drilling on a Lathe (Tyler Lane)
- Shaping on a Lathe (Tyler Lane)
- Shaping with a Sanding Disc (Tyler Lane)
- Shaping with Misc Tools (Tyler Lane)
- Bamboo Shanks
- Hardwood Shank Extensions
- Trever Talbert on Sawing and Shaping
- Trever Talbert on Drilling
- Trever Talbert on Detail Shaping
- Creating Pipes From Morta (Trever Talbert)
- Shaping Before Drilling
The Chicago pipe show site has some videos of pipe making:
Video processes Papalia pipe
Joel Shaperio (JS Pipes) has a nice photo essay of his Pipe making process
An excellent video of Hans "Former" Nielson making a billiard, by Lars Kiel. How Former makes a Billiard
Stems
Pre-molded stems
Pre-molded stems come in a fairly large variety of shapes and sizes. They are available in both Vulcanite and Acrylic/Lucite. These are useful for the beginner pipe maker & pipe repairman. Extensive work is needed on most pre-molded stems to get them to fit the pipe properly, and conform to the shape of the pipe shank. If the stem is being fitted to a "bent" pipe, it will also need to be heated and bent to shape. In addition to fitting the stem to the stummel, most hand made pipe makers will make significant modifications to pre-molded stems by thinning the bits, and opening up the air ways.
Pre-molded stem tenons are oversize so that they can be fit precisely to the mortise in the shank. Either the integral tenon is turned, sanded and buffed to the correct diameter, or a retro-fit Delrin tenon can be used. [1].

Turning integral tenons to size is best done on a metal lathe. To accomplish this the stem must fit through the center of the lathe chuck. After the stem is mounted, turning the tenon to size can be handled much like turning a tenon on rod stock (see Turning Tenons). Without a suitable lathe, a device such as the Pimo Tenon Turning Tool can be used in either a drill press, or a mounted power hand drill (see Using the Pimo Tenon Turning Tool). J.H. Lowe and others also make tenon turning tools for this procedure. While there are many better alternatives, the Pimo tool is the cheapest, and will get the job done once mastered, but most pipe makers will soon see that a metal lathe is worth the investment.
Using a Delrin tenon is an excellent solution on pre-molded stems, and avoids the pitfalls of turning an integral tenon. The trick with using Delrin is accurately facing and drilling the stem in preparation to gluing in the Delrin. Any deviation from 90 degrees between stem face and tenon will make it impossible to have a flush fit to the stummel. Again, a lathe makes this a simple procedure. A drill press or mounted power hand drill can also be used, but the stem must be held in a vice or jig to insure the finished tenon and stem face are kept perfectly square. First cut off the existing tenon, mount it in the vice or jig, face off the stem (Forstner bits are excellent for this), and drill mortise in the stem for the Delrin (see Using Delrin Tenons.
J.H.Lowe and Pipe Makers Emporium carry a fairly decent selection of pre-molded stems. For other suppliers see the Materials and Supplies section at the bottom of this page.
Hand cut stems
The basis for the following section was written by Tyler Lane for his website, and is used by permission.
Since the majority of pipes are made of stems that were pre-formed, I think it is safe to say that stems were largely an afterthought for most pipes. I suspect that when most folks think of pipe making, they think of stummel shaping and stem fitting. I do not think it even crosses the mind of the majority of hobbyist pipe makers to actually hand cut stems. I am of the opinion that this is an unfortunate mistake. The stem, both functionally and aesthetically, is a huge part of the success of a pipe. Here's why:
- Most flow problems in a pipe are in the stem. If you have ever had a wet smoker that whistled when you drew through the pipe when empty, I can almost guarantee you the whistle and wetness were caused by the stem. Lack of care in the stem is the demise of many pipes.
- The comfort of the stem in one's mouth can have a major influence on whether or not it becomes a favorite of the smoker.
- Because of the variations on shape, size and proportion of stummels are infinite, but the economical feasibility of manufacturing pre-formed stems requires a very limited number of shapes and sizes, using pre-formed stems requires compromises on pipe design. By contrast, stems made expressly to complete the design of a singular pipe offers the opportunity for the most aesthetically pleasing pipe.
- Vulcanite is commonly considered the most comfortable stem material in the teeth. Its main drawback is that it oxidizes and therefore requires maintenance; however, the high-grade German vulcanite typically used for hand cut stems is a MUCH superior material to the vulcanite used for pre-formed stems. As such, the German vulcanite used for hand cut stems oxidizes so little that it requires little more care than the bowl of the pipe, while retaining its comfort advantage over acrylic.
All that said, I do offer some pointers on using pre-formed stems because I recognize the economic necessity of needing to start pipe making with compromises. Since we cannot buy pre-formed stummels, and start pipe making by fitting hand cut bits to pre-formed stummels, we opt for the choice to make stummels and fit pre-formed stems. It is a fine place to start, and thanks to the Pimo tenon turning tool, a relatively inexpensive place to start.
Tyler Lane on Drilling Vulcanite Rod | Turning Tenons | Cutting the Slit
Trever Talbert on Stem Work
Kurt Huhn photo essay on Hand Cut Stems (mostly covers shaping).
Delrin tenons
Delrin is the brand name for an acetal resin engineering plastic invented and sold by DuPont. Often marketed and used as a metal substitute, Delrin is a lightweight, low-friction, and wear-resistant plastic capable of operating in temperatures in excess of 90 degrees celsius (approx 200 degrees Fahrenheit). According to the material safety data sheet from DuPont, the material has a slight odor of formaldehyde.
Other names for this compound include: polyoxymethylene (POM), acetal resin, polytrioxane and polyformaldehyde.
The Food and Drug Administration has approved Delrin for use in the food industry.
Delrin has proven to be an excellent material for stem tenons in pipe making. It is self-lubricating, and strong. Its strength can also be a disadvantage through--should a pipe with a Delrin tenon be dropped, the shank might break instead of the tenon. Shank repairs are, of course, much more problematic then stem replacement, or repairs to a broken tenon. Another disadvantage is Delrin also limits the shape of the stem near the shank of the pipe where the Delrin is glued into the stem. This is especially problematic for saddle or 1/2 saddle stems where the design must accommodate the location of the Delrin instead of simply worrying about the air way itself. Still, Delrin is the prefered tenon material of many pipe makers, and an excellent alternative to cutting tenons into hand cut stems, or turning down the tenons on pre-molded stems.
See Using Delrin Tenons for a complete outline of how to use Delrin tenons.
Stem inserts
Stem inserts are used as accents by many pipe makers. To clarify, inserts become part of the stem and are not to be confused with shank extensions, which become part of the stummel (see Shank Extensions), although some designs do blur these distinctions. Stem inserts are most often made from material that contrast with the stummel and stem, so lighter materials, or materials that contain lighter components to them, tend to be the most aesthetically pleasing. At one point, Ivory was popular with pipemakers. Elephant Ivory can no longer be purchased legally or used ethically. Some fossilized Ivory (such as mastodon, mammoth, and walrus Ivory) is still used, as well as antler, horn, bone, boxwood, and many other exotic hardwoods. Most often an end cap of the same material used for the stem is used to sandwich in the insert material. See Stem Inserts for suggested techniques.
Finishing
This is a critical aspect of pipe making that is often the demise of an otherwise nice pipe. Finishing a pipe can take often take as long, or longer, than the shaping of the pipe. Care in this process is worth it, as the result will be both beautiful and lasting.
Sanding | Staining | Polishing | Rustication | Sand blasting | Stamping | Trever Talbert on Finishing
Tooling
Machines

Machines can be a huge asset while making pipes. Each pipe maker finds and refines their own methods, so the machines used vary greatly, but the following types of machines are common to professional and serious amateur pipe makers.
Wood Lathe | Drill Press | Metal Lathe | Band Saw | Dremel | Belt Sander | Disk Sander | Buffer
Hand Tools
In addition to the hand tools listed in the Basic Tools section, most professional and serious amateur pipe makers will want to acquire the following:
Tools for stamping or marking
Custom made stamp with name and/or logo: Most US pipe makers are using Paul at A&M steel stamps. He has made something of a specialty out of supplying pipe makers. The angles of the steel he uses is designed for wood and will cut cleaner than generic stamps.
A & M Steel Stamps
55 Windsor Ave,
Mineola, N.Y. 11501
Phone: 516-741-6223
E-mail: mailto:amsteelstamps@yahoo.com
A set of generic 1/16" to 1/8" letter and number stamps is also helpful. 3/32" may be the ideal size, but is more difficult to find, and more expensive. Harbor freight sometimes has the 1/16" set and almost always has the 1/8" stamp set stamps. Brownells has 1/16", 3/32", and an interesting looking stamp guide.
Drills and Bits
This section and its sub-sections are in the very early stages of development, please feel free to dive in! I had to leave them before finishing. We need photo examples of the options listed.

You just can't have too many options when it comes to drills and bits, or I guess any other tooling! Pipe making requires a combination of specialty or customized bits, and off-the-shelf drills. Even the off-the-shelf drills used are sometimes hard to find locally and must be ordered.
Chamber Bits


This is a huge subject, and one that should perhaps split off into its own article. Pipe makers use a variety of tobacco chamber bits, depending on the machines and techniques used. The four major categories are:
- Spade type bits that have been specially ground are the easiest to acquire. They are inexpensive, and easy to make yourself by modifying off the shelf spade bits. Pimo Pipecraft and J.H. Lowe both make modified spoon bits.
- Silver and Deming (S&D) drills can also by specially ground for use as chamber bits. They tend to cut cleaner and faster than the modified spade tip bits. While possible to grind yourself, it is more difficult. Custom ground bits can be ordered, but they are considerably more costly than the modified spade bits. Ken Lamb, and Trent Rudat both make modified S&D bits.
- Customized tobacco chamber bits that resemble spoon bits are used by many of the Danish pipe makers, and are now being used by many others. These are nearly essential for the shape first method that involves holding the previously shaped stummel in ones hands, and pushing it into the spinning bit. They can be difficult to get. PiaPipes (Tom Eltang) has them on their Website. In the past, Brad Pohlmann a highly skilled machinist and pipe maker also made a batch of excellent chamber bits in this style.
Bur Bits are another type of bit which can be used to drill the chamber. Standard bur's having a 1/4 in. dia. shank will fit most any drill chuck and will drill holes with straight or tapered sides and rounded bottoms, perfect for pipe bowls. They are available up to 1 in. dia. round-ball shaped, and 3/4 in. dia. oval-egg, and tree w/radius end shapes and in other shapes and sizes at www.mcmaster.com (mfg. www.fullertontool.com) and some other tool suppliers. They drill very cleanly, except some spiral marking on the sides which can be sanded out, but they are very slow, and will burn the wood if you drill too fast.

Drills for mortise and draught holes
Many pipes makers are using a 5/16" mortise, and a 5/32" draught hole, but will vary this according to the design of the pipe. The types of bit used vary depending on the technique employed and if the mortise is drilled before or after the draught hole. Options include:
- Brad or Spur tip wood bits. These work best when the mortise is drilled before the draught hole, or have fresh wood to center the spur, otherwise they can be pulled off course. In fresh wood, they track very well and produce a relatively flat hole (with a point at the bottom from the spur), the flatness facilitates a precise fit with the stem tenon, while the spur point in the center of the hole can also provide an excellent start for centering the bit used to drill the draught hole.
- Standard Silver&Deming bits work great too, especially if you're following a previously drilled draught hole. The main drawback is that the end of your tenon will need to be tapered to match the bottom of the mortise.
- Forstner bits are an excellent choice. They leave a nice flat hole with clean sides. They're accurate and will not tend to follow grain or a previously drilled hole.
- An inexpensive alternative for drilling the mortise are end mill bits. The advantage is that they drill/mill perfectly flat bottomed holes, plus are available in increments of 1/64".

Forstner bits

Forstner bits, named after their inventor, Benjamin Forstner, bore precise, flat-bottomed holes in wood, in any orientation with respect to the wood grain. They can cut on the edge of a block of wood, and can cut overlapping holes.[2] In pipe making Forstner bits are often used for facing operations while making shanks and stems, and can also be used for facing the top of the bowl. Many pipe makers also use them for drilling the mortise, providing a smooth flat bottomed hole that facilitates a precise tenon to mortise fit.
You will find cheap sets of Forstner bits abound in discount stores, but these are not accurate enough for shank and stem facing work, where precision ground bits can make all the difference in facilitating a flush fit. Respected brands include Freud, Famag, Fisch (there are many others). The important thing to look for is "precision ground" bits, and avoid the cheap sets.
Drills for stems

6" long taper point drills are an excellent choice for drilling out stem rod. 4mm, 5/32", and 9/64", and 1/8" are popular choices, depending on design preferences.
The taper point drill is stopped around 3/4" short of the bit end and followed up with a smaller straight bit that will facilitate thinning the stem at the bit for maximum comfort and aesthetics. Popular choices for this are HSS S&D bits in 1/16", or 2mm diameters, with some pipe makers going as small as 1 mm. 6" long "aircraft bits" enable this portion to be drilled from the same end as the rest of the air hole, or the rod stock can be flipped around and drilled from the other end with a shorter bit so long as proper alignment can be achieved with a self centering chuck or vice.
Other helpful bits
- Because they are short and very robust, machinist's centers or small countersinks of various diameters are very helpful for starting holes accurately in stems and stummels.
- Countersinks can be helpful for beveling the edge of the mortise, and larger ones can facilitate beveling the tobacco chamber in certain designs.
Materials and Supplies

DENMARK
- P.E.Hermann: Assorted Pipemaking Supplies.
- Pia Pipes: Spoon bits, assorted briar blocks and stems (Tom Eltang)
GERMANY
- Dan Pipe: Pipe Kits; Briar; Preformed stems, Ebonite rod, Assorted finishing supplies.
- Marco Janzen - Hermann von Appen: Assorted Pipemaking Supplies.
- Pfeifenecke, Alles für Pfeifenbauer: Assorted Pipemaking Supplies.
GREECE
- Alexander Briar Pipes: Greek Briar
- Amadeus Pipes: Greek Briar
- Spoon-Bits.com: Tools and kits for pipe makers. E-Mail: mailto:info@spoon-bits.com
ITALY
- Orim Metalli: Silver and other Metal manufacturing
- Romeo Briar (Mimmo): Italian Briar
- Calabria Pipe: Italian Briar
- Domenico Giordano: Italian Briar
SPAIN
- Jaume Hom: Spanish Briar
- Sucesores de Emilio Navarro, S.L.: Spanish Briar
USA
- American Smoking Pipe Co.: owned & operated by Mark Tinsky
- J.H.Lowe: owned & operated by Tim West: Briar; Pipe Kits; Rod - Vulcanite & Acrylic/Lucite; Preformed Stems - Vulcanite & Acrylic/Lucite; Shank Repair Bands; Finishing Products - Buffs, Compounds, Abrasives, Stains, Wax; Machine Parts - Tenon Cutters, Arbors, Sanding Discs, Mortise Drill; Tools - Drills, Taps, Spade, Bits; Miscellaneous - Bone Screws, Delrin Tenons, Teflon Push Sets, Top Bowls, Bamboo, Calabash Bowls.
- Vermont Freehand, owned and operation by Steve Norse E-mail: mailto:stevenorse@gmail.com . Steve also runs a store on eBay, but it is best to contact him directly for the best price. He has Briar from Italy and Algeria, Ebonite from several suppliers, bamboo, pre-made stems, pipe kits, and other tools and supplies for making pipes.
- RawKrafted owned and operated by Premal Chheda Briar, Olive Wood, Pipe Kits, Ebonite Rod, Acrylic Rod, Stems, Bamboo, Drill Bits, Pipe Making Tooling, Buffing and finishing supplies
- Briar Pipe Tooling: owned & operated by Trent Rudat: Lathe chuck jaws customized for pipemakers; Silver & Deming bits ground for tobacco chamber boring; Any custom tooling to your specifications & requirements.
- Delvie's Plastics Inc.: Acrylic Rod for Stems; Buffing Wheels; Buffing Compounds; Buffing Machines.
- Grizzly Industrial, Inc.: Buffing Wheels; Buffing Compounds; Buffing Machines; wood & metal working machines.
- Jamestown Distributors: Taper Point Drill Bits; Abrasives.
- Parks Pipes: Briar Blocks.
- Penguin Briar: Pipe Kits, custom drilled to customer specs using good quality Algerian Briar.
- E.A. Carey Predrilled Briar Pipe Kits
- Masecraft Supply Company: Assorted Natural & Alternative Stem, stem insert, shank extension materials.
- A&M Steel Stamps, Custom Stamps for pipe makers: Paul Argendorf, Phone: 516-741-6223, Email: amsteelstamp@optonline.net
- Buckeye Engraving: Custom Stamp Maker used by some U.S. pipe makers
- Infinity Stamps, Inc.: E-mail: inquiries@infinitystamps.com, Phone: 818-576-1188, Fax: 818-576-1166, Address: 8577 Canoga Ave., Canoga Park, CA 91304, U.S.
- MLCS Core Box and Round Nose bits for boring tobacco chamber.
- Caswell: Buffing supplies.
- McMaster-Carr Supply Co.: Huge general supply catalog, easy to find what you need & order, good prices on many items.
- OnlineMetals.com: Delrin, stainless tubing, brass, etc...
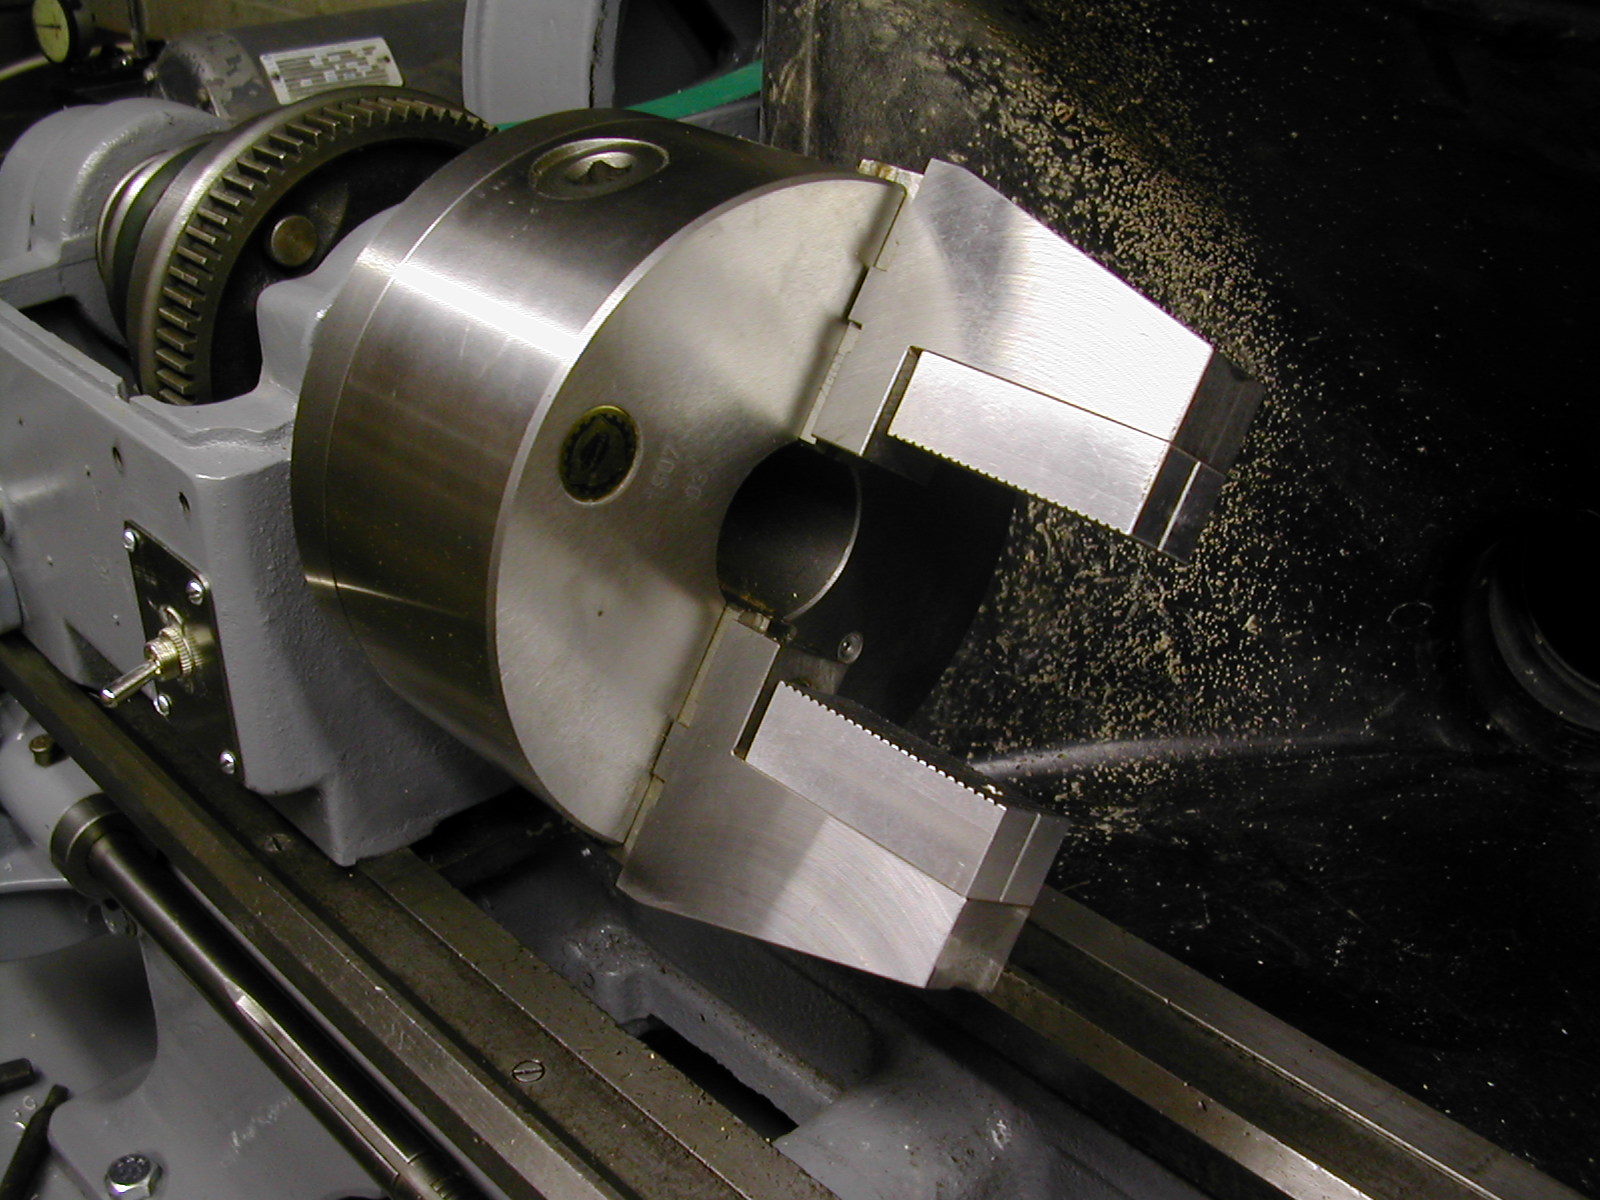
- Mark Yingling [3] Machinist and Pipemaker, made these chuck jaws.
IRAN
- http://www.mastrorahimi.com Briar, Bamboo, Horn, pipe tools, pipe stands, pipe filter